LAPTOP • DAILYTECH.ID - Chromebooks have carved out a massive niche for themselves by being fast, secure, and incredibly straightforward. But because Google decided to rethink the keyboard layout, even the simplest tasks—like taking a screenshot—can feel like a bit of a scavenger hunt if you’re used to a Windows PC or a MacBook. There is no “Print Screen” button here, and those function keys at the top have been replaced by a row of utility icons that actually make a lot of sense once you get the hang of them.
A screenshot is more than just a picture of your screen; it’s a way to save a digital receipt, grab a meme, document a software bug, or help a student keep track of lecture notes. In the ChromeOS ecosystem, the screenshot tool is surprisingly powerful, offering built-in editing, screen recording, and seamless integration with Google Drive. We are going to break down every single way to capture your screen so you can stop fumbling with keys and start working more efficiently.
How Chromebook Screenshots Differ from Windows and Mac
If you are coming from Windows, you’re likely looking for the PrtSc key or using the Snipping Tool. If you’re a Mac convert, you’re probably used to Cmd + Shift + 3. Chromebooks take a different approach. The “star of the show” on a Chromebook keyboard is the Show Windows key. It looks like a little rectangle with two vertical lines next to it, usually located in the top row, right in the middle (where the F5 key would sit on a traditional keyboard).
Unlike Windows, where a screenshot often just sits in your clipboard waiting to be pasted, or Mac, where it litters your desktop, ChromeOS manages screenshots through a dedicated “Screen Capture” interface. It’s a more unified experience that treats still images and video recordings as part of the same workflow.
The Three Types of Screenshots You Need to Know
Before we get into the button-mashing, let’s look at the three main ways we can capture what we’re looking at.
1. Full Screen Screenshot
This is the “capture everything” option. It takes a snapshot of every single pixel visible on your monitor. This is great for when you need to show someone exactly what your entire desktop looks like, including the shelf (the taskbar at the bottom) and all open windows.
2. Partial / Selected Area Screenshot
This is arguably the most useful mode. Instead of taking the whole screen and cropping it later, you can draw a box around a specific image, a paragraph of text, or a specific part of a website. It saves space and keeps the focus on what matters.
3. Window Screenshot
Sometimes you have five apps open, but you only want to show someone what’s happening in your browser or your chat window. The Window Screenshot allows you to click on one specific active window and ignore everything else happening in the background.
How to Screenshot Using Keyboard Shortcuts
Shortcuts are the bread and butter of the Chromebook experience. Once these become muscle memory, you’ll be able to grab info in seconds.
Screenshot the Entire Screen
To grab everything at once, hold down the Ctrl key and press the Show Windows key.
Shortcut:
Ctrl + [Show Windows]
You’ll see a brief animation and a notification in the bottom-right corner of your screen letting you know the capture was successful.
Screenshot a Selected Area
If you only want a specific piece of the screen, add the Shift key to the mix.
Shortcut:
Ctrl + Shift + [Show Windows]
Once you hit this combo, your screen will dim slightly, and your cursor will turn into a crosshair. Click and drag your mouse to draw a box around the area you want to save. Once you let go, the screenshot is taken.
Screenshot a Specific Window
This one is a bit more surgical. You’ll use the Alt key for this one.
Shortcut:
Ctrl + Alt + [Show Windows]
After pressing these keys, ChromeOS will ask you to click on the window you want to capture. This is perfect for when you want a clean image of an app without showing your desktop wallpaper or other open tabs.
Screenshot in Tablet Mode
Many Chromebooks are “2-in-1s” or tablets (like the Lenovo Duet). If you have your keyboard folded back or detached, you can’t use shortcuts. In this case, use the physical buttons on the side of the device.
Action: Press the Power Button + Volume Down Button simultaneously.
It works exactly like it does on an Android phone.
Using the Chromebook Screen Capture Tool
If you aren’t a fan of memorizing keyboard combinations, Google has built a beautiful visual menu called the Screen Capture Tool.
Opening the Screen Capture Toolbar
You can find this in your Quick Settings panel. Click on the time in the bottom-right corner of your screen (the “Shelf”). In the menu that pops up, look for the icon labeled Screen Capture.
When you click it, a floating toolbar appears at the bottom of your screen. This toolbar is your command center for everything related to images and video.
Screenshot vs. Screen Recording
On the left side of this floating toolbar, you’ll see two icons: a camera (for still screenshots) and a video camera (for screen recording). This makes it incredibly easy to switch. If you need to show someone a “how-to” process, you can flip to the video icon, record your steps, and even toggle your microphone on to narrate what you’re doing.
Capture Mode Options
The middle section of the toolbar allows you to toggle between the three modes we discussed earlier:
- Full Screen (Square icon): Captures the whole thing.
- Partial (Square with dotted lines): Let’s you drag and drop a selection box.
- Window (Window icon): Let’s you pick one specific app window.
How to Take Screenshots Without a Keyboard
We touched on tablet mode earlier, but there are other ways to grab a screen if your keyboard is out of reach or you’re using a touchscreen-only interface.
Using Quick Settings
Even if you are using a mouse or your finger on a touchscreen, the Quick Settings method is the most reliable. Just tap the clock, tap Screen Capture, and choose your mode. It’s accessible from any screen and doesn’t require any fancy finger gymnastics.
The Touchscreen Method
If you have a Chromebook with a stylus (like a Samsung Galaxy Chromebook or an HP x360), there is often a Stylus Tools icon on your shelf. Tapping this with your pen usually brings up a specialized menu that includes “Capture Region.” This allows for much more precise selections than using your finger.
Where Screenshots Are Saved on Chromebook
One of the most common frustrations for new users is “Where did that file just go?”
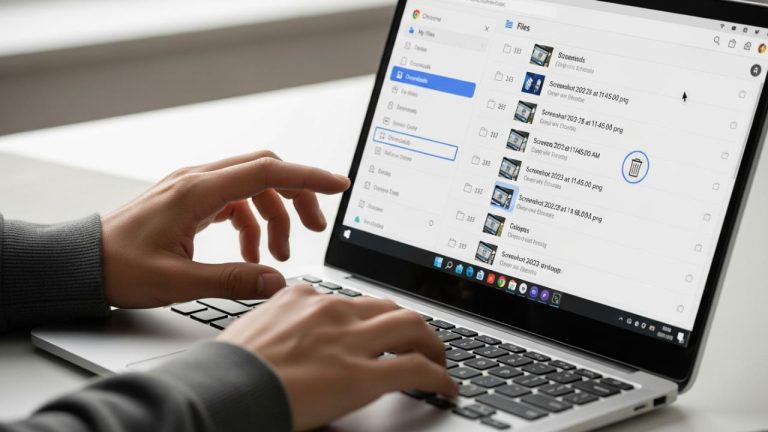
The Default Save Location
By default, every screenshot you take is saved to your Downloads folder. You can find this by opening the Files app (the blue folder icon on your shelf).
Recent Screenshots and the Clipboard
ChromeOS handles files a bit differently to make things faster for us:
- The Notification: When you take a screenshot, a preview appears in the bottom-right. You can click this to open the image immediately.
- The Clipboard: Screenshots are automatically copied to your clipboard. If you are in the middle of writing an email or a Google Doc, you can just press
Ctrl + Vto paste the image immediately without ever opening the Files app. - The Tote: If you look at your shelf near the clock, you’ll see a small circular icon that shows previews of your most recent downloads. This is called the “Tote.” Your latest screenshots live here for quick drag-and-drop access.
How to Edit Screenshots on Chromebook
You don’t need to download a fancy photo editor to make quick changes. ChromeOS has a built-in “Gallery” app that handles the basics perfectly.
Built-in Editor Features
When you click on a screenshot notification or open it from the Files app, you are taken to the Gallery. At the top of the screen, you’ll see tools for:
- Cropping: If your “full screen” shot had a bit too much clutter, you can trim the edges.
- Resizing: Change the dimensions if the file is too large for an upload.
- Lighting/Color: Adjust brightness or contrast if the screen was too dark.
Draw and Annotate
This is the most helpful part for collaboration. You can select the Annotate tool (the pen icon) to draw arrows, circle specific buttons, or highlight text. You can choose different colors and line thicknesses, which is a lifesaver when you’re trying to explain a technical issue to a friend or coworker.
Editing from the Notification Panel
You don’t even have to “open” the file to start. The notification that pops up right after you take the screenshot has an Edit button. Clicking this takes you straight into the annotation mode.
Chromebook Screenshot Use Cases
Why would you use these different modes? Let’s look at how we use them in our daily lives.
For Students
- Capturing Lectures: If you’re watching a Zoom class or a YouTube tutorial, a quick
Ctrl + Show Windowsgrabs a slide so you can review it later. - Assignments: Use the partial screenshot tool to grab a specific diagram from an e-book and paste it directly into your Google Slides presentation.
For Work
- Documentation: If you are building a manual for a new hire, the Window Screenshot tool gives you clean, professional-looking images of your software without showing your personal bookmarks or browser tabs.
- Tutorials: Using the Screen Recording feature within the Capture Tool is the best way to record a 30-second “How-to” for a client.
Common Screenshot Problems on Chromebook
Even the best tech has its “off” days. If you’re struggling, here’s what’s usually going on.
Screenshot Shortcuts Not Working
If your keys aren’t responding, check if you’ve remapped them. Go to Settings > Device > Keyboard and make sure the top-row keys are set to their default functions. Also, make sure your Ctrl or Alt keys aren’t physically stuck.
Missing Show Windows Key
If you are using a third-party Windows keyboard with your Chromebook, you won’t see the Show Windows icon. In 99% of cases, the F5 key acts as the replacement. If that doesn’t work, try F6 or the “Windows” key + F5.
Storage or Permission Issues
If you get an error saying the screenshot couldn’t be saved, your Downloads folder might be full. Chromebooks (especially budget ones) often have limited local storage. Try moving some old files to Google Drive to free up space.
Chromebook Screenshot Tips and Shortcuts
To wrap things up, let’s look at some “Pro” moves to make your workflow even faster.
Faster Screenshot Workflow: The Clipboard History
Did you know ChromeOS has a clipboard manager? If you took three screenshots in a row and want to paste them one by one, press Search + V (or Launcher + V). This brings up a menu of your last five copied items, including images. It’s a massive time-saver.
Organizing Screenshots Efficiently
Since everything goes to “Downloads,” it can get messy. You can change the default save location. Open the Screen Capture Tool, click the Settings (gear icon), and select “Select Folder.” We recommend creating a folder in your Google Drive called “Screenshots” so they are backed up to the cloud automatically and don’t clutter your local storage.
FAQ – How to Screenshot on Chromebook
The fastest way is Ctrl + Show Windows. This captures the entire screen instantly.
Press Ctrl + Shift + Show Windows. Your cursor becomes a crosshair; just click and drag to select the area you want to capture.
By default, they are saved in your Downloads folder. You can also find them in the “Tote” on your shelf or in your clipboard.
Tap the clock in the bottom-right corner and select the Screen Capture icon, or press the Power + Volume Down buttons if you are in tablet mode.
Native scrolling screenshots aren’t a built-in feature of ChromeOS yet. However, you can use a Chrome extension like “GoFullPage” to capture a long website from top to bottom.
Conclusion
Taking a screenshot on a Chromebook might feel a little different at first, but it’s actually designed to be more flexible than the old-school “Print Screen” method. Whether you prefer the lightning-fast keyboard shortcuts or the visual Screen Capture toolbar, you have all the tools you need to save and share information.
If you’re just grabbing a quick image to paste into a chat, stick with the Ctrl + Show Windows shortcut. But if you’re creating a tutorial or need to highlight specific details, don’t be afraid to use the Screen Capture Tool and the built-in annotation features. Once you customize your save location to Google Drive, you’ll have a seamless, cloud-synced workflow that makes Windows and Mac feel a bit clunky by comparison!