APPS • DAILYTECH.ID - You’ve just spent hours crafting the perfect survey or application in Microsoft Word or Google Docs, only to realize that collecting responses means copying and pasting or dealing with messy email attachments. It’s a universal pain point! The good news is that you don’t have to rebuild your entire document from scratch. If you’ve been wondering how to create a Google Form from a Word Document or Google Doc, you’re in the right place. While there isn’t a magical one-click button to convert your file directly, we have a simple, two-step process that utilizes a powerful, free Google Workspace add-on. This method is the fastest, most reliable way to turn your existing text-based content into a dynamic, data-collecting form.
Why You Should Convert Your Document to a Google Form
Before we dive into the “how,” let’s quickly talk about the “why.” You’ve already done the hard work of writing all your questions. So, why go the extra step to move them into a Google Form? The answer lies in automation and data management. Google Forms offers powerful features that a static document simply can’t match.
Unlike a traditional document, a Google Form automatically collates all your responses into a neat, easily readable Google Sheet, saving you countless hours of manual data entry. Forms also allow for conditional logic, meaning you can show or hide questions based on a user’s previous answer—a feature that provides a much cleaner, customized user experience. Furthermore, you can embed the form directly onto a website, share it via a simple link, or even email it directly to respondents, drastically improving your distribution options.
Converting your content from a Word or Google Docs file transforms your data collection from a manual chore into a streamlined, professional process. We’ll show you a clever way to bypass the slow, question-by-question manual transfer process and use a tool that’s a true game-changer for anyone who frequently needs to create a fillable form in Google Docs that can be easily shared.
Leveraging an Add-on to Create a Google Form from an Existing Document
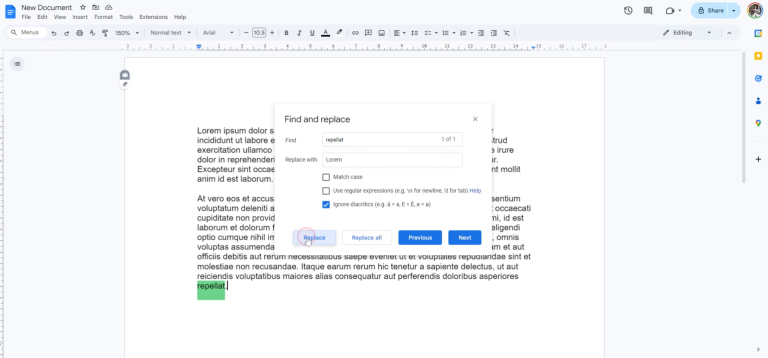
Manually copying and pasting hundreds of questions is soul-crushing. To save you from this agony, the best and most efficient method involves using a third-party add-on specifically designed for this task. The most popular and reliable option is an extension called “Form Builder.” This tool is available for free (with paid premium options) directly from the Google Workspace Marketplace and is designed to parse the text in your Google Doc and automatically convert it into appropriate Google Form question types.
This is the workaround you need. Instead of starting in a new Form window, you’ll work directly in your already-created Google Doc. This process essentially teaches the add-on how to read your document structure so it knows which line is a question, which is an answer option, and which is just a note. Once you master the simple formatting rules, you can convert a lengthy document into a working form in minutes, rather than hours. This step-by-step process is crucial for efficiency, especially when dealing with complex surveys or registration forms that include many multiple-choice options.
Step 1: Install the Form Builder Add-on
The first move is to install the tool that will do the heavy lifting for you.
- Open your existing Google Doc that contains all the questions you want to convert. If your original file is a Word document, you’ll need to upload it to your Google Drive first and then open it with Google Docs.
- Navigate to the Extensions menu at the top of your document.
- Click on Add-ons, then select Get add-ons.
- In the search bar, type “Form Builder” and select the correct extension by Form Builder by G Suite (or a similar, highly-rated form conversion tool).
- Click Install and grant the necessary permissions. Once installed, the add-on will be accessible from the Extensions menu in any of your Google Docs.
Step 2: Format Your Document for Accurate Conversion
The add-on needs a little help to understand your document. You need to use specific markers to tell it what kind of question each line should become. This step is critical for successful conversion from your original Word or Google Docs file.
- Designate Question Types: At the start of each question line, use a simple tag in brackets to define the question type. For instance, put
[Multiple Choice]before a multiple-choice question,[Short Answer]before a name field, or[Paragraph]before an open-ended comment box. - Separate Options: For multiple-choice, checkboxes, or dropdown questions, list each answer option immediately below the question, separated by a unique marker like a semicolon or a hard return. The most straightforward method is usually one option per line.
- Clean Up: Remove any extra headings, introductory paragraphs, or images that are not part of the questions themselves. The cleaner your document, the better the conversion will be. A properly formatted document helps the Form Builder understand how to structure the resulting fillable form in Google Docs ecosystem.
Step 3: Run the Conversion to Create Your Google Form
With your document formatted and the add-on installed, you’re ready for the main event—turning that text into a functional form.
- Go back to the Extensions menu in your Google Doc.
- Hover over Form Builder and click Start. A sidebar will open on the right side of your screen.
- In the sidebar, you’ll see options to select the source of the form. Choose Document (as your Google Doc is the source).
- The add-on will scan your document. Once the scan is complete, it will display a list of questions it has identified based on your formatting. Review this list to ensure all questions and options are correctly categorized.
- Click the Create Form button at the bottom of the sidebar. The tool will automatically create a Google Form from your Word Document (now a Google Doc) and place it in your Google Drive. You’ll get a link to the new form, ready for final review and sharing.
Best Practices for Editing and Sharing Your New Google Form
Once the conversion is complete, your work isn’t quite done. You’ll need to polish your new form to make it user-friendly and professional. Even the best automated tool won’t be perfect, so a quick manual review is always necessary.
First, review the question types. Check whether the add-on correctly identified short text answers versus date fields. You may need to manually change some [Short Answer] fields to Date or Time to ensure accurate data collection.
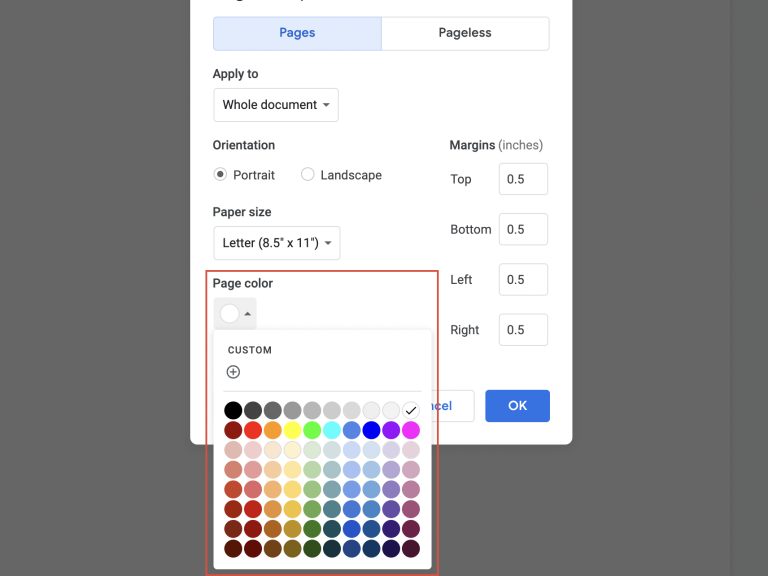
Next, customize the design. Open the Theme options (the palette icon) to add your company’s logo, brand colors, and background image. This step is essential for maintaining brand consistency and making the form look more professional.
Finally, test the logic. If your original document included Section Breaks, verify that the form logic (showing or hiding pages based on responses) functions properly. Before sharing publicly, send the form link to a few colleagues to test the submission process.
This final review ensures that your effort to create a Google Form from a Word Document results in a flawless, professional form. You can also refer to our guide on creating a Google Form for best practices, or explore various google form templates for inspiration.
Frequently Asked Questions
No. You cannot directly convert a scanned image or PDF. The Form Builder add-on requires editable text. You must first use an OCR (Optical Character Recognition) tool to convert the PDF image into a Google Doc or Word file before attempting the form conversion process.
While you can create a simple form template in Google Docs by using tables and basic text fields, it won’t be a true “fillable form.” It cannot automatically collect and aggregate data into a spreadsheet like a Google Form does, making it inefficient for serious data collection.
The add-on primarily focuses on text parsing for questions and answers. While the document can contain tables and images, the Form Builder will likely ignore them, or they may interfere with accurate question identification. It’s best to remove or simplify complex formatting before conversion.
No. Conditional logic (“Go to section based on answer”) must be set up manually within the final Google Form interface after the document conversion is complete. The document formatting only converts the core questions and answer options.
You can use the Primary Keyword within the main form title or in the introductory description. For example, you could title the form: “The Easiest Way to Create a Google Form from a Word Document.” This ensures keyword visibility while keeping the form contextually relevant.
Yes, the core functionality for converting a document into a Google Form is typically available in the free version of most popular Form Builder add-ons. Premium versions usually unlock advanced features like importing forms from Google Sheets or more robust bulk operations.
Conclusion
The thought of manually rebuilding a lengthy document into a dynamic web form is daunting, which is why knowing how to create a Google Form from a Word Document efficiently is such a powerful time-saver. By leveraging a simple, yet incredibly effective add-on like Form Builder, you bypass the soul-crushing copy-and-paste routine. You’re not just converting a document; you’re transforming static information into an automated data collection powerhouse. Now you can spend less time on manual entry and more time analyzing the great responses you’re about to receive.
Key Steps to Convert Your Document to a Google Form
- Install the Form Builder Add-on – a crucial tool for parsing text and automating the form creation process.
- Format Your Text – use clear tags like
[Multiple Choice]to define question types for accurate conversion. - Run the Conversion – use the add-on sidebar to instantly generate a working form in your Google Drive.
- Review and Test – make final adjustments to question types and design to ensure a professional, smooth user experience.
These steps are all you need to efficiently streamline your data collection. Take these tips and start converting your existing documents today!